The Formspree CLI
The Formspree CLI offers a workflow for building and deploying forms that works nicely with modern JavaScript tools like npm and React. Forms can be deployed automatically using CI/CD tools or platforms like Github, Vercel and Netlify.
Setting up your project
Note: Formspree CLI currently supports React forms. We’re working on Vue and vanilla JavaScript support. If you’re not using React, you can still use Formspree by creating forms in the dashboard. See this article on creating a dashboard project.
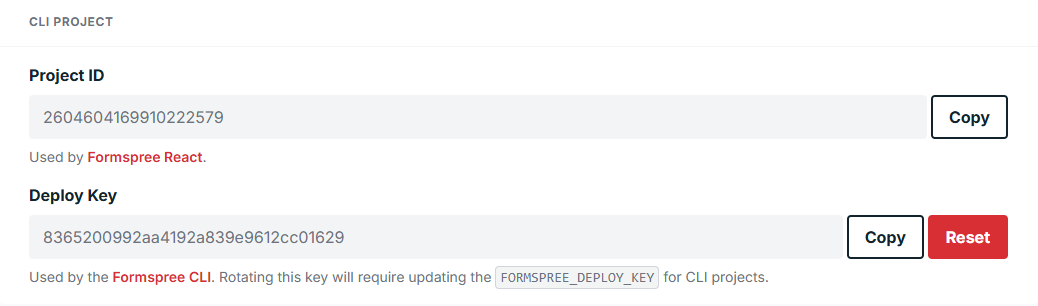
The first step is to create a new CLI project in the Formspree dashboard. Once created, you’ll see a Project ID and a Deploy Key in the Settings of your Project:
Next, you can use our React library to connect your new project to your front-end app. First install the react library using npm or yarn.
npm install @formspree/reactThen import FormspreeProvider and put it near the top of your component hierarchy, wrapping your forms. Supply the FormspreeProvider with your project ID obtained above.
For example, if you are using Next.js, here’s what a top-level _app.js file might look like:
import { FormspreeProvider } from '@formspree/react';

function App({ Component, pageProps }) {
  return (
    <FormspreeProvider project="YOUR_PROJECT_ID">
      <Component {...pageProps} />
    </FormspreeProvider>
  );
}
export default App;
Now you’re ready to install the Formspree CLI and start creating forms.
Installing the CLI
To get started, run the following commands to install the Formspree command line interface and initialize your project:
npm i -g @formspree/cli
formspree init
This will create an empty formspree.json file in the root of your project. This is where you will configure your forms.
Creating Form Endpoints
Creating forms with the Formspree CLI is accomplished by editing the formspree.json file. This file contains a list of form keys and associated configurations. Here is an example of a newsletter opt-in form configuration that signs up subscribers to a Mailchimp list:
{
  "forms": {
    "signupForm": {
      "name": "Sign-Up Form",
      "actions": [{
        "app": "mailchimp",
        "type": "addOrUpdateContact",
        "apiKey": "$FORMSPREE_MAILCHIMP_APIKEY"
      }]
    }
  }
}
For a more in-depth explanation of the various configuration options see the formspree.json reference here: The formspree.json File
Environment Variables
Many form actions, such as Mailchimp and ConvertKit, require access keys for authentication. These keys should not be saved in configuration files that are checked into version control. Instead, these variables can be kept in the environment, and accessed by the Formspree CLI only during deployment.
You can refer to environment variables in formspree.json by using $ notation. In the sign-up form example above, the Mailchimp plugin refers to an API key stored in the FORMSPREE_MAILCHIMP_APIKEY environment variable.
        ...
        "apiKey": "$FORMSPREE_MAILCHIMP_APIKEY"
        ...
As a convenience, the Formspree CLI will check for environment variables defined in a .env file before searching the environment. If you use a .env file, just remember, do not commit your .env file to version control.
Building Forms with React
To build a form, you can use the useForm hook from the formspree-react library. It surfaces functions to handle form submissions, and manage form state.
Initialize the form in React by calling useForm and passing the form key you used in the formspree.json file.
const [state, handleSubmit] = useForm('{form-key}');Here’s what a form component might look like for the signupForm endpoint we created above:
import { useForm } from '@formspree/react';

function SignupForm() {
  const [state, handleSubmit] = useForm('signupForm');
  if (state.succeeded) {
    return <div>Thank you for signing up!</div>;
  }
  return (
    <form onSubmit={handleSubmit}>
      <label htmlFor="email">Email</label>
      <input id="email" type="email" name="email" />
      <button type="submit" disabled={state.submitting}>Sign up</button>
    </form>
  )
}
For more information about creating forms with React see the article on the Formspree React Library.
Deploying Forms
To apply the changes you make to your formspree.json file, run the deploy command:
formspree deploy -k <your-deploy-key>Your deploy key can be found under the project’s “Settings” tab in Formspree.
Instead of using the -k flag every time, you can create a .env file in the root of your project and define an environment variable:
echo "FORMSPREE_DEPLOY_KEY=<your-deploy-key>" >> .env
echo ".env" >> .gitignore
Do not commit your .env file to version control.
You should treat your deploy key like any other secret token. A common convention is to create a .env.example file (excluding the actual key) that developers can use as a template:
echo "FORMSPREE_DEPLOY_KEY=" >> .env.exampleContinuous Deployment
Deploying your forms in a production environment follows the same principles as deploying locally. The main difference is, rather than using a .env file for your environment variables, you must configure those variables in your deployment settings.
Environment variables should match the $ variable names you’ve defined in your formspree.json configuration, with the exception of the FORMSPREE_DEPLOY_KEY which is needed by formspree deploy.
For example, in GitHub you can add Secrets to your repository settings, and then refer to them as environment variables in your workflow like this:
steps:
  - shell: bash
    env:
      - FORMSPREE_DEPLOY_KEY: ${{ secrets.FormspreeDeployKey }}
      - FORMSPREE_MAILCHIMP_APIKEY: ${{ secrets.MailchimpAPIKey }}
    run: formspree deploy